She believed she could. So she did.


Showing posts with label Sewing. Show all posts

Saturday, January 14, 2012

Ubiquitous

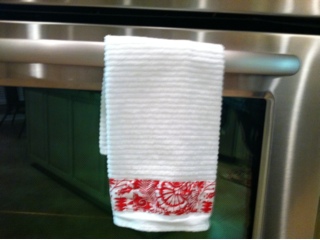
Remember when your momma bought new fabric for the kitchen curtains and you ended up with a pair of shorts and a pillowcase with the extra yardage? That's my happy red and white cotton that I got for a steal at Joann's a few days before Christmas. I'm a nut for red. It has found itself on strippy tea towels, an Ali Foster foldover clutch, and an appliquéd heart pillow. And best of all, there's still enough left for some kitchen curtains.

Wednesday, January 11, 2012

Peace.

Although everyone is pretty much over peace signs, there's something still so endearing about them to me. The button is my favorite.

Springing Up Clutches

The gloomy days of winter call for a little spring inspiration.

Tuesday, January 10, 2012

Before and After: Pillow Re-Do

Quick, appliquéd pillow re-do. Fun addition to the sewing studio.

Sunday, January 8, 2012

Hello, Beautiful: Fold-Over Clutch

Recently, my Nonna gave me a huge sack of buttons she collected over the years. I was absolutely thrilled. The day after Christmas, Anna-Jane helped me go through them and we ran across this ivory butterfly button. It was so inspiring I knew I had to use it on something. I love that vintagey, eclectic vibe. I made 2 fold-over clutches over the break from Ali Foster patterns. The instructions were very clear and the pictures walked through every step. I tweaked the pattern a little so that the bottom stands up on its own. This third one I made with the special button is my favorite and pretty perfect. The clutch has a magnetic snap, so I got to use some pliers (cool). I really like how the instructions show how to make the strap. You cut a piece of fabric 2 1/2 by 11. Iron on interfacing. Fold strip in half wrong sides together and iron. Then fold the edges into the middle crease and iron again. Topstitch. The strap has a good weight to it and the width is perfect. This pattern is too big to use a fat quarter which is kinda a bummer, but it was fun to make and turned out really cute.

Tuesday, January 3, 2012

With or Without Wings: That is the Question

Over the holidays I made 3 owl clutches. One for Wendy's niece, one for a birthday present, and one for my sister. The question became: With or without wings? The first ones that I made in the fall had wings but that creates a lot of parts to appliqué: head, body, 2 wings, 2 feet, beak, and eyes (background and pupil). It takes me (because I'm so slow) about an hour to do the appliqué. So I switched things up and drew an owl with just a body, feet, beak, and eyes. Less is more, right? But the last 2 I made seem to lack the character of the others. Is it the wings?

Game Set Match - Clutches for the Tennis Team

Wendy's mom Donna is a member of a 70s ladies tennis team. I was flattered when she ordered 12 gathered clutches to give as Christmas gifts. So after Anna-Jane's birthday party, I took a 24 hour R & R and then hit it hard Sunday and Monday until the wee hours. We designed them to match their skirts which are black, gray, and pink. I found cute ribbon with tennis rackets on it at fabric.com. Cute and not too gimmicky. I took a picture of the prototype. The actual clutches had a polka-dot front and black linen back. I ended up making 13 (of course) because I totally messed up the first zipper. I decided to get all jiggy wit' it like the blogging pros and not use a zipper foot. Bad idea. The stitch was so close to the zipper, it wouldn't zip very well. Ugh! At midnight on Sunday, I realized that I was running low on black thread so I was checking and praying every 2 minutes that it would last. Then when I got to the quote part found that I had just enough of the transfers so no mess ups allowed. Towards the end I forgot to sew in a strap so had to do some seam ripping. But on the bright side, I figured out a way to pin the zipper when you are sewing around the clutch at the very end to ensure the lining gets sewed right. And it was super fun to have my first order and make some $$$. :-)

Monday, January 2, 2012

Celebrating 5 Years

We celebrated Anna-Jane's turning 5 at Healthy Me Cafe in Coppell with a cooking party. The kids made smoothies, personal pizzas, decorated cookies and cupcakes. While planning the party, Mother and I got the bright idea to make all of the kids aprons. In years past only a handful of kids have shown up to her parties. Being the workaholic that I am, I invariably get the invitations out late and it's during the holidays, so calendars fill up fast. This year, of course, we had 17 RSVPs. (Thank you Cathy for helping me create a cute e-vite and send it out on time). So Momma and I were burning the midnight oil during what is one of the busiest weeks in a school-- the week before winter break. We made 11 girl aprons and 6 boy aprons. The ties took forever. Instead of measuring and figuring out exactly how long each tie should be, I cut strips and strips, and strips, and more strips together and then used the trusty ol' safety pin to turn it. Then iron it. Ugh! It took forever. Mother made 5 aprons in the time it took me to turn the strip for the ties. After that afternoon my homework was to finish putting the ties on the girl aprons and mom made all of the boy aprons. It sounds like she woke up at 3:30 am on the day of the party to start and finish hers. I tell her all the time that she could win Project Runway. She is smart, quick, and dexterous. Instead of doing the turn thing for the strips/ties, she cut strips on the bias, folded it in and then folded it again to create the binding. She said she didn't even iron it to make the strip. She just rolled it along through her fingers as she sewed. They were all perfect. She continually amazes me with all her talents and skills. Of course, I was so in to watching Anna-Jane at her party that I didn't get good pics of the aprons but here's a few. I'm thinking we should have a birthday Princess Prom for Anna's 6th year and Mother can make all 17 kids a formal ball gown with a train. Heh!

Thursday, November 3, 2011

Our Little Angel

Milly's school celebrates All Saints Day on November 1. She was our little angel. This was the 2nd angel costume I made. Mother and I thought we would be all crafty and smart and make the first one during the summer when we had the time. We really thought we would be ahead of the curve. But... she grew out of the first one by the time the event rolled around, so we were up sewing late into the night like always. I was even able to make a big mess by bumping into a can of red tempera paint on Mildred's art easel that splattered all over the wall. It really added to the Halloween effect of the night. My boo-boo on this one was the casing for the elastic. I sewed it on the outside instead of the inside. Oops...

Monday, October 24, 2011

Clutch for Sandy the Dog Sitter


I had been saving that little butterfly for something. I had orginally envisioned it appliqued with some cool stitching on the bottom corner of just a plain tailored clutch. But it was super late and I got all crafty crazy and ended up with some kinda weird triangle thing. I didn't account for the seam allowance so some of the butterfly is clipped off. Hmmm.... As Mr. Bokies my 10th grade Geometry teacher used to say, "If you fail to plan, plan to fail." Of course, there's always a secret on the inside.

Friday, October 14, 2011

A robin for Robin

Robin's 50th birthday was October 12. We celebrated the day Southern-style. Salad drenched in cucumber dressing (literally, to die for) crunchy fried chicken, buttery mashed potatoes, and melt in your mouth biscuits at Celebrations.

I'm happy with the way this turned out. I stayed up really really late to make it. It was around 11 p.m. and I thought, "Hey, I'm a big girl." I can do whatever I want. So what if I stay up a little late." Famous last words right? Ugggg, is all I can say. This big-40-year-old girl needs her zzzzz... I felt hung over the entire day after even after 2 Emergen-Cs and Diet Dr. Pepper (which is really a cure all for just about anything). Cracks me up! But it was fun to be in the zone and sew and create something special for Robin. I really like the proportions and the colors. I even got snazzy with the handle and scrappyfied it.


The inside has a thought that we could all use from time to time.


Ahhhhh... Breathe peace.... and know that staying up late and eating fried chicken and laughing and creating from time to time are what life's all about. Why get too tangled up in our to-do lists, schedules, planners, meetings, and what-not? All of the externalities of life eventually fade away. What matters is the inside--the happy heart.  Happy Birthday, Robin!

Monday, October 3, 2011

6 Days of Sewing Challenge

I'm challenging myself to 6 days of sewing. A sew-along with myself. Six clutches in six days. Tonight I made the gathered strips for the scrappy flower clutches. I'm going to work assembly line style and see how it goes.
Step 1: Make the scrappy flowers, cut all pieces
Step 2: Gather the front panels and stitch on the bands.
Step 3: Install the zippers
Step 4: Applique the lining quotes
Step 5: Sew around and finish
Step 6: Marvel at the greatness.

Sunday, October 2, 2011

A Little Birdie...

It's important to work on conquering your fears... whether it be afraid of the dark, spiders, the boogey man or even applique... This simple tutorial helped me conquer that fear. Now I am mighty over of the applique! Applique Queen Goddess High Priestess! Her Royal Majesty Applique! I read lots of tutorials before coming across this one. It's really simple. And don't be afraid to boss your machine around a little. It is not the boss of you. Move that fabric where it needs to go! You are not a push-over! :-)

The quote is borrowed from one our teacher's email signature. Sometimes we need a reminder to sit still, take the time to hear the birds chirp and sing, smell the flowers, and breathe peace.

I used a little blue bead for the bird's eye on the other two that I made. I think it gives it a little more personality.

The next step in the evolution of this clutch is to think about the birdie's legs. Probably some simple stitches in brown embroidery thread would do it. But hand sewing is so 18th century (heh!). This is when I really need an intern.

Saturday, October 1, 2011

Introducing... The Scrappy Flower Gathered Clutch!

Is this the cutest thing ever or what? The scrappy flower gathered clutch. I adapted a flower tutorial from Sew Serendipity and tweaked the gathered clutch pattern from Noodlehead. I love the results! So cute and girlie! In the flower tutorial, the creator Kay Whitt uses a fancy dancy gathering foot on her machine. I called Richland Sewing Center and they cost $59 bucks--sorry not this month. I found it is just as do-able to gather the old-fashioned way. I just ran two basting stitching down the entire length of the pressed over fabric and then gathered while watching Parenthood. Kinda therapeutic. The strips gather up nicely to about half the length of the original strip.

The original pattern for the gathered clutch uses a 14 inch strip for the front and that gathers down to about 9 inches. I used an 18 inch strip. I like the puffier-ness of it. I also reduced the width of the front band that hides the gathering stitches by an inch. I like the proportions of the way it turned out.

My only dilemma with the piece is how to attach the flower to the clutch. Right now it is fastened on with a big ole safety pin. Probably the best way to do it is to hand sew it on, but I have no patience for that. I'm part of the microwave generation, you know. I thought about using fabric glue. Is that too tacky. It's very frowned up on Project Runway. A crafty friend suggested velcro, but I'm afraid it would pull off. What to do, what to do, what to do???

Friday, September 30, 2011

Wednesday, September 21, 2011

Peace Out!

Remember the Cosby Show episode where Denise convinced Theo that she could make the same expensive yellow satin designer shirt he saw in a store window with the same pinache for mere pennies and in no time at all? That episode reminds me of this purse.


I will affectionately call it the Wendy Bag; although, I hold no affection for it at all. When I look at it, all I see is that mustard-yellow-jacked-up-one-sleeve-longer-than-the-other shirt that Theo wore on his date.

I was inspired by this adorable bag that Wendy's co-worker carries. Eighteen dollars at Trader's Village.

I just love all of the stitching and embroidery. The cute colors. The cool peace signs and the hip distressed look of it all. Like Denise from the Cosby Show, I took one look, snapped my fingers and thought what a breeze. I can make that “No Problem!” Ha!
I used a pattern from Sew-Fisto-Cats. That should have been my first sign of trouble. The irony of the name adds to the disaster of the Wendy bag.  
As with most things, I began with high hopes. I'm satisfied with the applique on the front and the ruffles of knit on the side. It's when I got to step 26 or something "putting the outside bag in the inside bag and flip" that things got wonky. I won't even horrify you with the details of the way-too-short-to-be-cool-at-all-strap. And originally, I think I bought the fabric for some curtains and it probably should have stayed that way. :-) Nonetheless, creativity is a process. We are always in the process of becoming whatever it is we are going to be and that certainly fits this bag.

I think Denise gave up designing and sewing and became a missionary to Africa. Hmmm... food for thought....


Sunday, September 11, 2011

Modern Clutch

My favorite clutch so far.
It has a pocket on the inside and a secret message.
It's made from yummy pieces of Moda Chrysalis layer cake which came with 42 cuts of 10x10 fabric. De--lish!